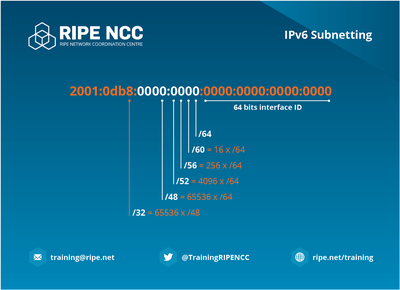
With each of our VPS services, you get a /124 IPv6 subnet (which is roughly 18,446,744,073,709,551,616 IPs).
To activate the IPv6 for a VPS, and to receive your /124 subnet, go to the VPS details page and on the bottom you will see a blue button labeled “Activate IPv6”. Click on it and the subnet will be assigned to your IPv6 VPS.
You will next need to statically assign the IP in your OS configuration.
Please keep in mind that SMTP connections are blocked and that rDNS is not configurable for IPv6 addresses.
To configure the first address on CentOS or Fedora, edit nano /etc/sysconfig/network-scripts/ifcfg-eth0 and add the following on the bottom:
    IPV6INIT=yes
    IPV6ADDR=2a0c:b9c0:f:XXX::1/124
    IPV6_DEFAULTGW=2a0c:b9c0:f:XXX::
To add multiple IPv6 addresses, add a new line like this
IPV6ADDR_SECONDARIES="2a0c:b9c0:f:XXX::2/124 2a0c:b9c0:f:XXX::5/124 2a0c:b9c0:f:XXX::100/124"
Restart the network service afterwards or reboot the vps.
On Debian, Ubuntu or Lubuntu, edit nano /etc/network/interfaces.d/eth0 and add the following on the bottom:
iface eth0 inet6 static
    address 2a0c:b9c0:f:XXX::1
    netmask 124
    gateway 2a0c:b9c0:f:XXX::
To add multiple IPv6 addresses, use aliases (do not add the gateway again), for example:
auto eth0:2
iface eth0:2 inet6 static
    address 2a0c:b9c0:f:XXX::2
    netmask 124

auto eth0:5
iface eth0:5 inet6 static
    address 2a0c:b9c0:f:XXX::5
    netmask 124
Restart the network service afterwards or reboot the vps.
On Windows, go to Network and Sharing Center, click on Change adapter settings, right click on the first Network Interface and choose Properties.
Select Internet Protocol Version 6 (TCP/IPv6) and click Properties
Check Use the following IPv6 address and enter as follows:
    IPv6 address: 2a0c:b9c0:f:XXX::1
    Subnet prefix length: 124
    Default gateway: 2a0c:b9c0:f:XXX::
Please keep in mind that your firewall might not handle IPv6 connections, leaving your server exposed. If iptables is used, you should also use ip6tables to firewall IPv6 connections for your IPv6 VPS.
